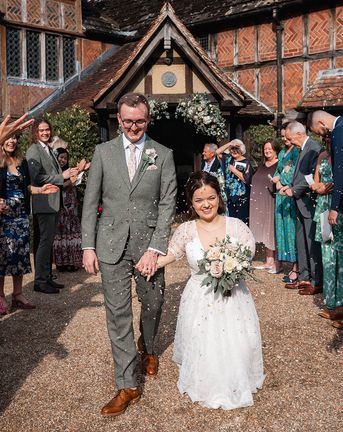
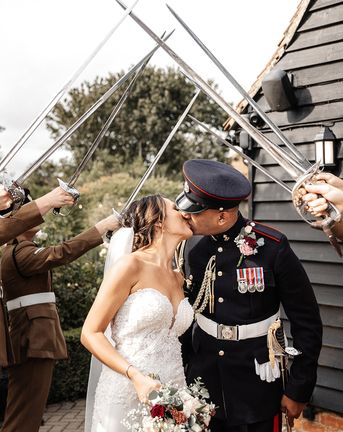
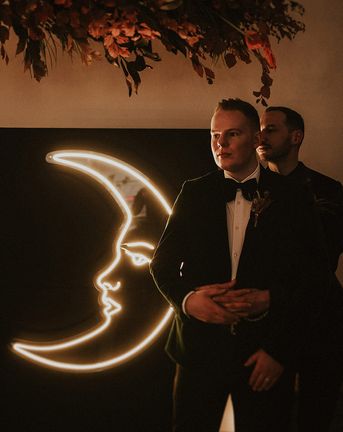
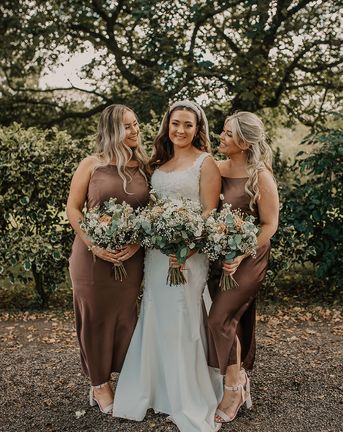
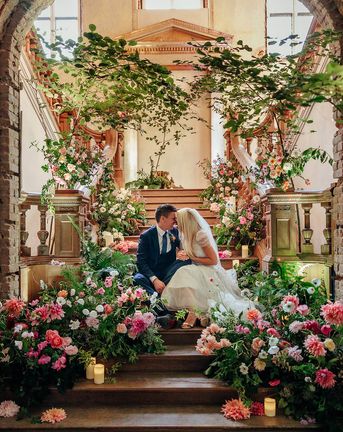
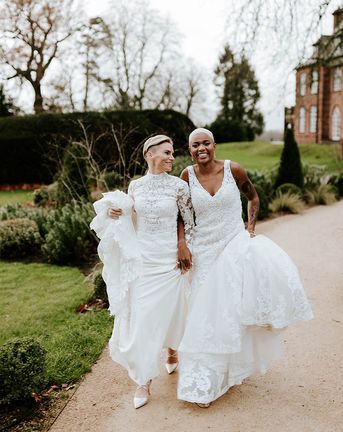
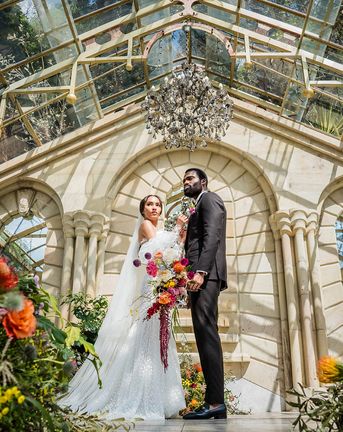
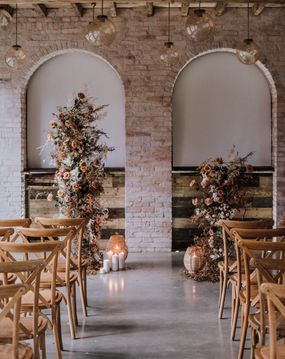
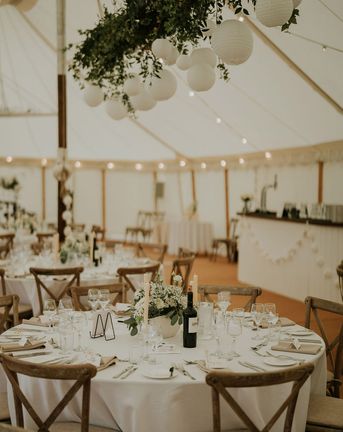
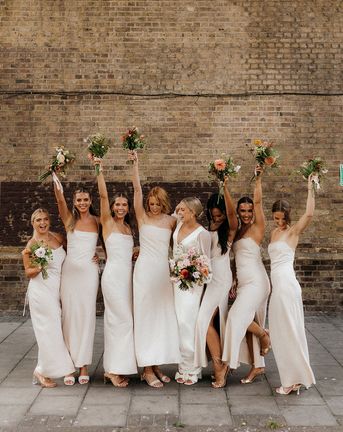
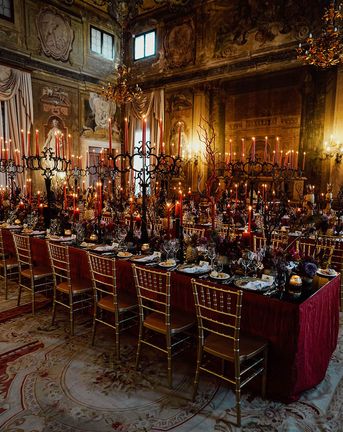
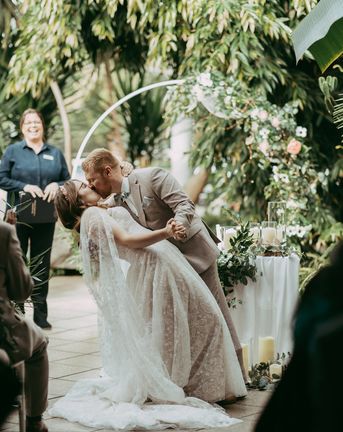
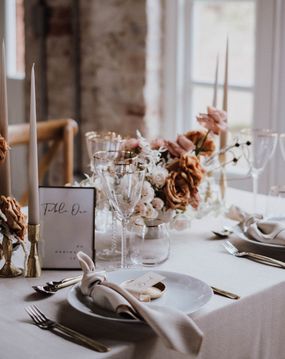
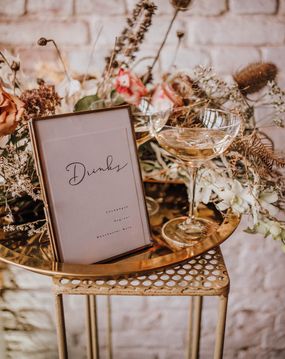
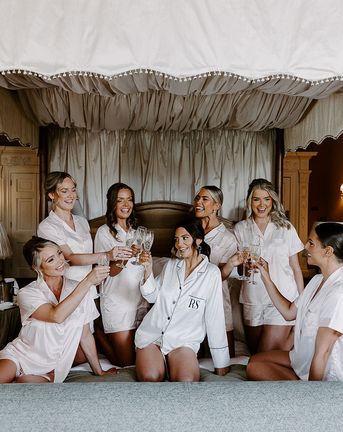
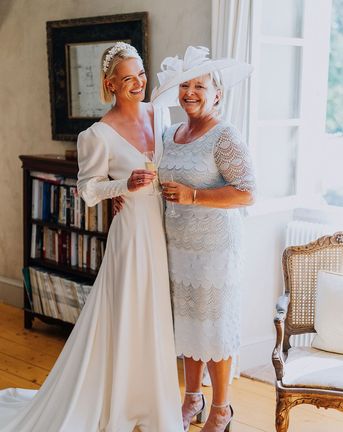
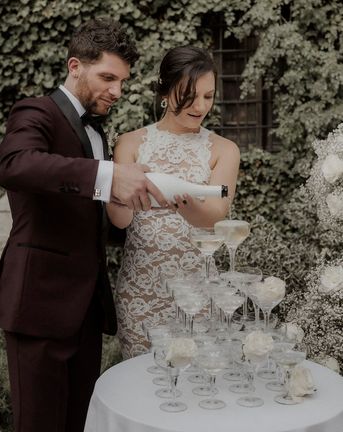
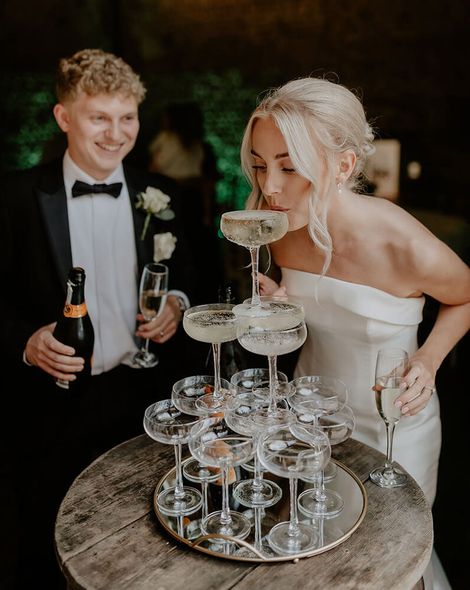
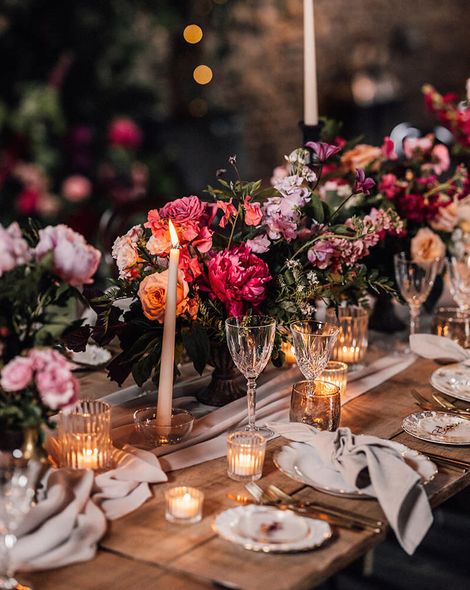
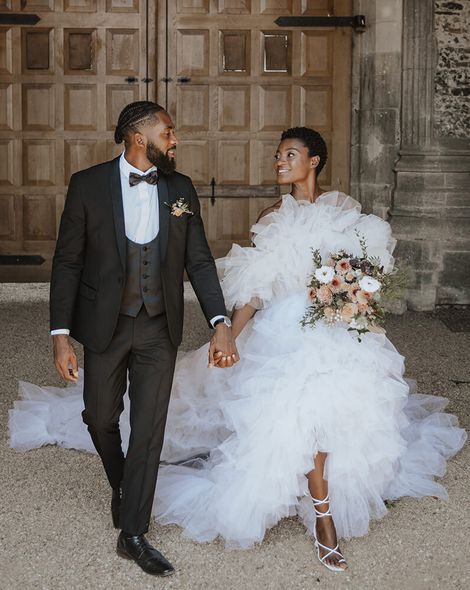
D.I.Y

Fancy Dress = Fun Times

December 30th, 2009

I have received many emails enquiring about “The Photoframe” game that we created for our wedding back in May – mainly how to make the “caption” boards that accompanied various hats, glasses and general guest posing opportunities.

They made for some pretty cool good fun shots………

Frame-1

And what better time to post a “How to” than during the Christmas break – you may even manage making them in time for a New Years Eve party!

So here is what you need:

1) Spray Mount ( from any good art shop)
2) Foam Board ( again any good art supplier)
3) Stanley Knife/scalpel
4) A funky chunky font ( we used Minya Nouvelle size 38)
5) A3 paper
6) A sturdy ruler ( metal is preferable)
7) A pencil

And here is what to do ( As modelled by RMW’s very own Adam – and no I don’t think he knows I am posting this again ;-) )

Step One – Print off your chosen “caption/phrase” onto A3 paper and measure a 3cm space above and below the type and either side so your caption has some lovely white space around it. It will stand out better in the pictures this way.

Frame-2

Step Two – Turn the paper with your phrase over and hold the spray mount 20cm away and spray evenly, turn around and press firmly onto the foam board ensuring it has fully adhered.

Frame-3

Step Three – Being extremely careful ( I take no responsibility for broken fingernails ladies!) cut along the edges with the scalpel using the ruler for support and to guarantee an straight even line.

Et Voila!

A fabulous D.I.Y caption for your Big Day picture perfection….

frame-4

And if you are having trouble thinking of some amusing phrases then check out a few of ours that we made for our wedding “after party” that we threw at the O’Shea residence back in September ( well y’know – wanted to continue the fun and all… and besides we had to show everyone the video….)

Frame-9

Frame-8
Frame-6
Frame-10
Frame-12
Frame-7
Frame-5
Frame-11

Yup. The dude in the big pink glasses who reckons he’s God is in fact my Dad.

He has always wanted to get himself on the blog ;-)

Happy New Year You Gorgeous Lot

Big Fun Time Love

Charlotte xxx

DIY Necklace Tutorial

December 29th, 2009

So back in the day when I wrote my original wedding report on a well known wedding forum, I was asked where I got my wedding day necklace from. It was a double stranded pearl and crystal necklace with 2 back strands.

1
(Contra’s wedding photography by Raw Photography)

Actually, I made it. And I’m pretty proud, for 2 reasons. Firstly, I saved myself around £400 on the one I wanted and secondly, it turned out pretty well! When the ladies who saw the necklace found out that it was made by me they asked that I tell them how-to and I promised a little DIY tutorial. And here it finally is!

You could apply this to making any kind of jewellery, it’s all the same principal so adapt it as you wish!

And DON’T BE SCARED! It’s a little tricky, and when I say that I mean ‘fiddly’ but it’s really NOT difficult.

So here is my personal Christmas Gift to the Rock My Wedding readership… Enjoy!

Yours Truly,

Contra
xoxo

PS! Special and massive thanks to my fab friends Roger and Laura who assisted me by taking the photos below with his sweeeeet Canon 7D. Love you guys! :)

What you need…

rog1

1. Jewellery making wire, also known as ‘Tiger tail’ – basically a stainless steel (for strength) plastic coated wire.

2. Crimping beads (above right), (made of silver, not just silver coloured – there’s little in it price wise)

3. Some pliers. (Those shown above are very crude and what I have used for years of making jewellery at home but were from B&Q and are not intended for this purpose! To make my necklace I used my mums crimp pliers which were much finer. I’d recommend making the purchase, again it’s only a small increase in price.)

4. Some wire cutters. (You can use kitchen/heavy duty scissors, but you’ll blunt them and the finish won’t be as nice!)

rog2

5. Beads. My Necklace was a combination of pearls and swarovski crystals. I chose to go for the real deal in terms of materials as it was my wedding day and I wanted to be able to keep them, however you could use faux pearls and non-swarovski crystals for a fraction of the price.

Pearls: Mine were from Oriental Pearls.net and I ordered 3 strands; One each in 5mm round, 7mm round and 10mm oval, all in white.

Swarovski Crystals: I bought mine from Crystallized off Regent street in London (opposite Liberty’s) and I would thoroughly recommend it.
The majority were bi-cones, but I also bought some 18mm Briolettes for the ends of the back strands and some 18mm flatter ones and 18mm long ones also for the back.
For the bi-cones, I bought 20 x 10mm’s (which come in packs of 10) and 40 x 8mm’s (which come in 20 packs) and some 4mm’s which help to stop the whole thing looking ‘heavy’. I bought all of them in ‘crystal’ (above right), which is their name for what is essentially a colourless crystal with no sheen. In the end, the necklace required 13 x 10mm and 25 x 8mm’s and I used a further 3 x 10mm’s and 9 x 8mm’s for the bracelet.

6. 1 xlobster clasp, also in silver and a ring for it to attach to. These things can also be purchased from the Crystallized shop or online.

I would recommend that you go and choose all these bits yourself then you can get a feel for the sizes and how chunky it will be etc. The staff are really helpful and will get everything out for you/offer help. You can even make it there with them if you want!

7. Blue-tac! ( – you’ll see!) :)

Phew!

The How-To (Easy Bit!)

1. Cut a piece of wire at least 6 inches longer than you think you will need for the length of your necklace. Use a blob of blue tac to make a little stopper at the end of it so when you start to thread your bead onto one end they don’t slide off the other!

2. Start threading on your beads at random. Try to vary the sizes so for example: Large pearl, medium pearl, small pearl, large crystal, small pearl, small crystal, large crystal, large pearl, medium pearl, large pearl, etc.

As you go, keep checking to see that it looks right and just random enough. This can be the most difficult part, but don’t despair! If you’re not happy, just slide off the part you don’t like and re-jig it.

rog3

3. Keep holding up the necklace (with care – don’t let go of the end or they will all slide off. I know because I’ve done it!) to your neck to see if it’s the right length yet. You may need a second pair of hands for this.

4. Before attaching your fastenings, use a jump ring to extend the lobster clasp. Bend the ring open and attach it to the built in hole in the lobster clasp, you will see why this is later.

5. When you’re happy with the length, to attach the lobster clasp, first thread on a crimping bead. Next thread on the lobster clasp. Take the wire and bend it back on itself (don’t fold it – the wire will ‘kink’) and thread it back through the crimping bead. Pull it all the way through, so it forms a tiny loop with the lobster clasp dangling from it. Leave it big enough to allow a bit of room around the lobster so it is flexible. When you are happy, use your tools (pliers) to ’squash’ the crimping bead really flat.

rog4

Hey Presto, the end is secure! If you are very dexterous, you can trim the wire prior to crimping the beads and shove the end down the middle of the bead next to the crimping bead to tidy it up. However this is often impossible so it’s perfectly acceptable to just wriggle your wire cutters in and trim the end close to the crimping bead whilst being VERY careful not to cut the remaining wire that you want to keep!!!

You can do exactly the same with the end of the necklace that is blue-tac secured. Thread the wire through a single jump ring, (which will be used for the lobster clasp to attach to on fastening the necklace,) first threading on a crimping bead and recreate the crimped loop as above.

If all you want is a single stranded necklace then you’re all done! However, if you want to recreate mine… you will need to make another strand, slightly longer, to sit nicely outside the one you have made already.

6. While you thread the beads on try to make sure that when they are lying next to each other the beads from each strand don’t end up with the same run of different sizes and shapes. Ideally to give a random effect, the large crystals on strand 1 shouldn’t sit next to large crystals on strand 2 for example.

7. For the back strands, instead of using blue-tac to secure the end first attach your briolette to the end of the strand using the technique above. Next thread your strand, using 2 larger crystals interspersed if you wish, until you are happy with both the arrangement and length.

8. When you are ready to attach the strand, it gets a little tricky. It’s the same method as above, but you must loop it through the ring at the side of the lobster. This is the main reason for using them, as they allow free movement and swinging of the strand. Once again, thread on a crimping bead, thread the wire through the ring and back down through the crimping bead. Pull tight (but leave a little slack to allow for movement,) and crimp!

rog5
This picture shows the six strands attaching to the rings at either end of the lobster clasp. ie the 2 back strands, bottom left and right, and each end of the 2 necklace strands on the top left and right. You can see that I use 2 crimping beads for extra security.

9. Repeat to make another back strand and attach it to the ring on the other side of the lobster clasp. Make the second strand a different length to the first either longer or shorter depending on your required finished length.

You can of course make a matching bracelet using the same methods as I used above.

Et voila!
rog6
rog7
If you still don’t feel confident, this last picture is to give you a clear idea of how to thread the strand ‘at random’.

I know these instructions are long winded but it’s really easy! Please do have a go anyway, and let us know how you get on!

Any questions, either comment below, or email me on rebecca@rockmywedding.co.uk and I’ll do my best to help!

Yours Truly,

Contra
xoxo

PS. For those of you who were disappointed to find that this wasn’t my DIY Veil tutorial, watch this space – it’s coming soon!

Priceless Paper

December 28th, 2009

Ho ho ho! Merry Christmas to one and all!

So here begins the first of our pre-scheduled posts, filled with treats for you all while we put our feet up with our own families and the RMW family, (more on this later). As you know, the whole idea behind these posts was to give our loyal readers a little something back and I’m pretty pleased with this little present as it could potentially save you a TON of money!

I spied this over on one of my daily blog stops The Wedding Chicks. A U.S. wedding blog and also shop, in my opinion their most fabulous niche is the beautiful stationery they make and share. Yes, that’s right, SHARE!

And so I am sharing the love, for The Wedding Chicks, and this stunning little Crown invitation Suite you can find over there…

Weddingchicksinvite

This gorgeous invitation suite was inspired by all things Etsy (a place you all know I love!) when the Wedding Chicks did a guest post.

With weddings being more and more expensive and stationery becoming a big part of the budget, we thought this might help you to squeeze a little extra from your pennies in the New Year. And the best thing, I think you’ll all agree, there’s absolutely no compromise on style with these vintage luxe look wedding invites.

The Suite comprises:
Save The Date
Invitation headed ‘Love’
RSVP card
Welcome card/Program
Menu

So get yourselves over there to check it out and their other free invitation downloads, and let us know if you think you will be using the Crown Invitation suite for your Wedding Day.

Yours Truly and Merry Christmas,

Contra
xoxo

Real Wedding Inspiration to DIY Doodlings….

December 11th, 2009

The Inspiration…

When Charlotte was doing a little blog research a while back, she came across a gorgeous wedding shot by Rosie Parsons and it actually proved to be the inspiration behind her Style Savvy post on Charlotte Balbier’s new collection. The Bride, Shella, was totally rocking Tabitha…

Parsons1
Parsons3

The Details…

It was a very chic wedding indeed with loads of super cute details and you can really feel the fun infused throughout the day, with a travel theme and a complete riot of crayon box colours mixed in with a host of origami cranes. The reception was held in a Tipi by Beautiful World Tents, located at Temple Island Meadow in Henley on Thames.

I’m particularly loving the Groom Derek’s non-floral peacock feather and ribbon tied boutonniere and Shella’s Birdcage Veil. Very Chic and Unique!

Parsons2
Parsons4

Sharing the love…

Now, being a details freak, I was instantly wowed by this wedding; Derek and Shella obviously put a whole lot of work into making the day absolutely fun-fabulous, (and in my opinion, no-one captures the details better than Rosie Parsons but if in fact if you are a stationary/font geek, (erm, just me then?) you will really heart the super funky menus at each place setting…

So how about a little freebie?

Shortly before we came across the gorgeous wedding above, I was doing my usual blog rounds one day and saw this cool post by iDiY. Now the lovely Luzel at iDiY, is always sourcing and most importantly sharing (we love you Luzel!) cool makes and finds, often including a free font or two…

And lo and behold there was Budmo Jiggler, a super cool marquee style font. Even better it was FREE! Luzel points us in the direction of Urban Fonts where you can download Budmo Jiggler (which, if it isn’t the very same font used above it is oh-so similar) for your personal use.

In the very same iDiY post was this super cute collection of images from Float Paperie a gorgeous US stationary company run by Andrea Tahlier, again using a similar font. Love love love!
floatpaperie

If you looked at the font and thought ‘that’s not very wedding,’ then think again and enjoy a few minutes admiring the fresh as a daisy yellow colour palette, made ever so chic with the addition of a soft dove grey. It’s not seen much in the UK but I am a massive fan of yellow and grey for a wedding palette.

And if you’re more of a wedding classic girl at heart, how about whipping up some party invitations with Budmo Jiggler? Circus themed birthday anyone? ( – Made cool by Take That again…) Rainbow lettered children’s party invite? New arrival to announce?

Enjoy and if you make something cool with Budmo Jiggler, drop us a line! We love to hear your thoughts here at Rock My Wedding!

Yours Truly,

Contra
xoxo

Bring Some Pom-Pom Cool to W-day

November 3rd, 2009

If you head over to the latest fabulous real wedding on RMW you would have noticed Anna’s spectacular D.I.Y decor – namley a whole heap of tissue paper pom-poms.

They rocked.

So if you are wondering how you too can add some pom pom cool to your Big Day then you’ve certainly come to the right place – I’m going to post courtesy of Martha Stewart, how you can Do It Yourself.

( Yes yes I know I clearly worship at the feet of Martha, I’m not ashamed to admit it either – she is officially my number one icon)

What you will need:

Tissue paper (in ANY fabulous colours you like) and 24-gauge white cloth-covered floral wire.

Pom-Final

Hanging Pom-Poms – How to:

1. Stack eight 20-by-30-inch sheets of tissue. Make 1 1/2-inch wide accordion folds, creasing with each fold.

2. Fold an 18-inch piece of floral wire in half, and slip over center of folded tissue; twist.

With scissors, trim ends of tissue into rounded or pointy shapes.

3. Separate layers, pulling away from center one at a time.

4. Tie a length of monofilament to floral wire for hanging.

And who says you just have to have these beauties hanging from the ceiling at a wedding?

Pom-Final-2

Adorn your vintage vehicle, wrap around a napkin or create a white winter wonderland for a rehearsal dinner or Christmas soiree.

Happy D.I.Y folks

Charlotte xxxx

Do It Yourself Pet.

October 28th, 2009

D.I.Y

I am such a HUGE fan.

And no I don’t mean putting up shelves or anything to do with crocheting quilts – I mean making stylish and unique pieces of pretty for your Big Day.

And where better to get inspirational Do It Yourself idea’s than one of my greatest icons of all time – Martha Stewart.

I mean seriously – is there anything that lady can’t do?

I’ve picked out my six favourite “make it” items and you can actually download the templates from the Martha Stewart site…..

Yup that’s right – some of them you don’t even have to do a fat lot of anything at all – hoorah!

Martha-Final-1

“Just Married” sign- hang it on your car or maybe even in your reception venue.
A bit of bunting -use as traditional decor or how about adding a guests name and table number to each individual paper as an alternative to escort cards?

Martha-Final-2

A flower girl parasol, use rain or shine they would make for some cuter than cute photo opportunities.
Some flag fancy – have ready to announce the “Speeches”, “First Dance” or how about “Time for the Cake”?

Martha-Final-3

The two I wish I had found in time for our Wedding – the “i Spy” game sheet, pair with a camera for some potentially VERY cool detail shots.
A “choose your own” pattern/material seating plan – loving the polka dots.

Hope you found at least one or two little nuggets of loveliness from this post, watch this space for RMW’s own D.I.Y extravaganza coming soon….

We’re gonna have a bloomin’ good go at making some downloadable fabulousness for all of our fantastic readers.

Oh yes we are.

Lots of non sticky-backed plastic love

Charlotte xxx

P.S – Got any D.I.Y idea’s of you own or template potential for RMW? then do let us know – we have a “planning” meeting in the next few weeks and we would love to put some reader requests into practice!