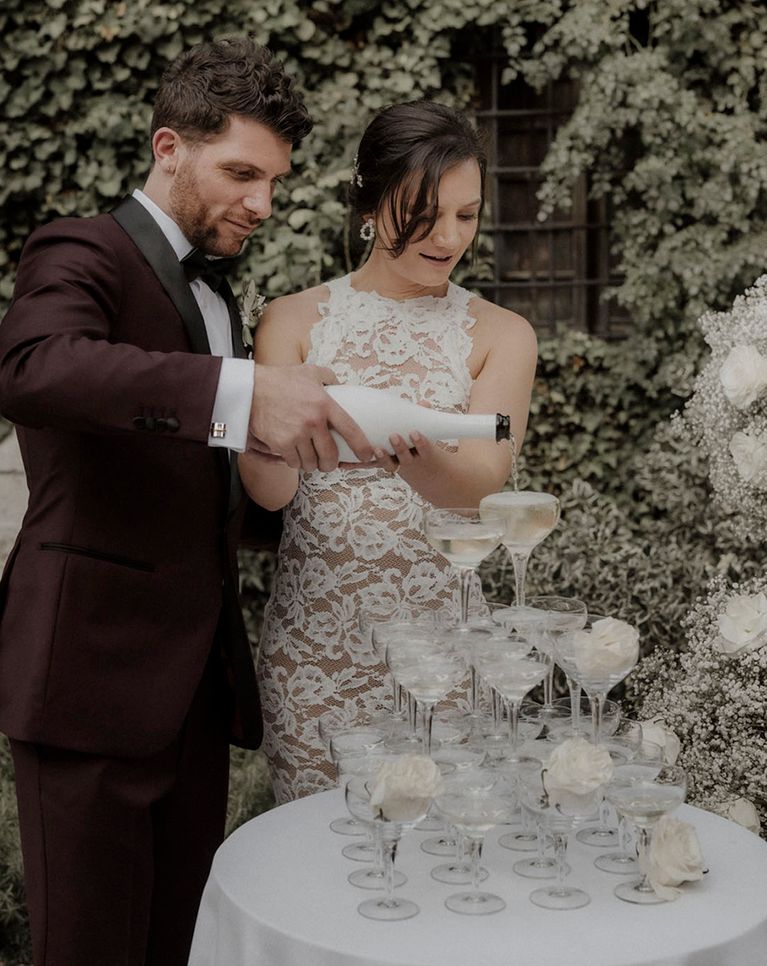
D.I.Y

Dolly DIY Devotee

May 8th, 2011

So after all the Dolly excitement, we’ve barely had time to squeeze everything in! And the same went for the shoot itself. Whilst we’re super happy with the way things turned out, like many brides I think, we’d have given our right arm for a little bit more time to add some extra DIY details, mainly for you guys!

So instead, I’m going to share those bits and pieces of paper pretty with you and maybe you’d like to use them for your own DIY plans.

Martha’s Ranunculas Downloadables

From who other than Martha can you trust to find everything you need?

This DIY stationery template set fitted perfectly with our ranunculas bouquet and (bonus) the colour scheme too. They also come in tulip and rose designs FYI. I only wish we had had time to print ‘em out!

DIY Post It Notes

From another of my favourite blogs, Eat Drink Chic, I thought these fitted well with the Pop theme, given their bright colours and cool font of the stamps, but as with everything DIY, they’re totally customisable. Originally created as a valentines surprise for your beloved, I imagined them as cute little table cards, like the ones Charlotte had at her Wedding for guests to pass around. Conjure up your own phrases and don’t be responsible for the outcome!

I’m thinking ‘The Best Man is Hot’, ‘I’m wearing my best Pants’, ‘Mark your Dance Card’ and ‘Will you Marry Me’…

See the whole post here.

So that’s it.

We still love DIY Devotee and so please do send in any projects you would like to share with the RMW commmunity that you have whipped up and as always, if you have any requests jot them down in the comments box and we’ll have a think about what we can do. :)

Yours Truly,

Rebecca
xoxo

Easter DIY and Inspiration shoot

April 19th, 2011

I don’t know about everyone else around here but I’m just about beside myself at the prospect of the four day weekend. I’m planning some celebrations as some of my friends visit from the South and lots of birthdays coincide, along with a well deserved break. With all this in mind, the glorious weather and plans afoot for spring time festivities, when we got an email from the very lovely Lou over at Whimsical Wonderland Weddings asking if we would like to share some of her recent DIY projects, I was bouncing around like a mad march hare!

Last week Lou celebrated her blogs 1 year birthday and instead of sitting back and counting her successes, she went all out and completely DIY’d her own little Spring inspiration shoot. Flowers, Favours, table runners, cake display, the lot.

And boy is it Pretty with a capital P.

Every single item you see here is budget beautiful and lovingly crafted by Lou’s own fair hand. Even better Lou has been kind enough to give you all instructions on how to re-create some of the elements she slaved over. Obviously this is perfect Wedding Inspiration, but you know what… I am totally planning on re-creating some of these bits and pieces for my Easter table and celebrations! (I’ll send you the pics Lou!)

I’m particularly in love with that little cake topper and her ideas for RMW – customising the egg cups :)

Genius!

So without further ado, I’m going to hand you over to Lou and her DIY tutorials… please make her very welcome ladies!

Hi Rock My Wedding readers!! I’m Lou from {www} and I’m so very excited to be guest posting for you today.

Cake Topper DIY Tutorial

There is a trend at the moment for simple, rustic, homemade-style cakes in the wedding industry and cake toppers are BIG news right now. It’s an easy, cute and quirky way to personalise your day.

There are so many toppers out there to choose from, but this one is very easy, you can completely personalise and adapt it to your taste and wedding theme.

What you need:

Assorted coloured paper

Two paper straws

Thread/Twine

Needle

Template

Scissors/Craft Knife

Print off your selected words in your preferred font, preferably on card.

Draw around your letters onto the paper and cut out using scissors or a sharp craft knife.

Tie one end of your twine or thread to one straw, and start threading your letters onto the thread. Be sure to choose the same height to thread and thread through twice in each letter to ensure the letter lays flat. Be careful, the paper is delicate. You can use card if you wish but it may be harder to make the holes for the thread.

Once the row of letters is in place tie the other end of the thread onto the second straw.

When you start on the next rows of lettering, make sure the thread is shorter; you want the straws to be closer at the bottom and wider at the top for full affect. Also find out the diameter of your cake to make sure it is in proportion.

Now insert the straws into your cake. {Make sure you store the topper safely until your wedding day, a box is best, as it’s very delicate.}

Don’t worry if it’s not perfect, it all adds to the ‘look’.

DIY Tin Can Centre Piece Tutorial

I thought for ages about what inexpensive way I could present my flowers in for the shoot. In the end I came up with tin cans, which given a lick of paint are given a whole new lease of life. They are the ultimate eco-friendly, budget and gorgeous centrepiece concept.

What you need:

Assorted Tin Cans

Paint {gloss}

Brush

Ribbons

Collect tin cans, different sized cans together look best.

Remove the labels and give them a good wash.

Start painting the cans in your chosen colours or patterns. Warning: I used acrylics and the cans started to rust, we ended up using some gloss paint we had.

Tie around mismatched pretty ribbons and fill them with gorgeous seasonal blooms.

DIY Egg Cup Favours Tutorial

Choosing original and fun favours that your guests will treasure is tricky, but I have the perfect solution for those Spring and Easter weddings…. Egg cups of course!

What you need:

Wooden Egg Cups

Paint {I used acrylics}

Paint Brush

Sandpaper

Twine

Felt or Fabric

Thread

Needle

Scissors

Lightly sand your egg cups, so that the paint sticks well to the cup.
Choose your colours and get painting; a contrasting colour on the inside makes it look really vibrant. You could even paint patterns such as the RMW polka dots!

For the name tags, get some felt or fabric and mark the initial lightly in pencil. Using your needle and thread, create a running stich along the initial. Cut to size. I like the little flag effect at the end, or choose another shape.

Get your twine and fold in two, thread it through the top of the tag and pull the ends through the loop.

Tie around your egg cup. For an extra cute finish why not put a flower head or some sweets in the egg cup?

I put my egg cups on mismatched fabric napkins with doilies on top of my plates to finish, for an extra touch tie some pretty ribbon around the cutlery. Layering really adds to the effect.
And voila, your guests will remember your big day each time they tuck into their boiled egg.

Top {www} Tip: Grab your egg cups cheap from eBay or craft shops.

Have fun and get crafting… your wedding day will have a personal touch, you will save money and of course it will look just divine ;)

Much love

Lou xoxo

Erm, supper pretty no? And are you not impressed by Lou’s dedication to the crafty cause with all this hard work! I hope you’re getting to put your feet up over Easter!

You can head over to {www} and see the whole post Lou did on her DIY inspiration shoot here, but do drop her a comment in the box below too and let us know if you will be using any of these little ideas for your Easter table or indeed big day! :)

Yours, Truly Inspired,

Rebecca
xoxo

DIY Devotee: A DIY Boutonniere or Corsage

March 18th, 2011

One of the DIY thoughts I had for my wedding was to do all the flowers myself… and I’m glad I didn’t, mainly because I had grand designs and there are some things only a florist can do. However, another idea I had was to make Pete’s Buttonhole (or Boutonniere as they call them across the pond) myself, and have it delivered to him on the wedding morning. And I kind of wish I had. How romantic would that have been? I chickened out, but I still think it’s an amazing gesture and something you could also do for your mum as a corsage. What a lovely thank you gift and a fab way of saying thank you for everything they have done to help you in exchange for something more valuable than money – your time.

So with that in mind, a little while back we asked Becky Hay from Blossom in Chorlton, Manchester, to make a DIY corsage on video this time for you to watch and digest and hopefully, DIY yourself!

What you need:

White (or a colour of your choice) ribbon

Ribbon scissors

Floristry scissors

Selection of silvery coloured wintry foliage (we used: Blue spruce, kochia & senecio)

White double lisianthus (The largest white flower shown)

White ‘Snowflake’ spray roses

Pins

How To…

Break the foliage into small pieces roughly the height of the buttonhole you want to create. Strip the bottom 1 – 1.5cm of each piece of foliage so you have clean, neat stems to bind together.

Do the same with any flowers you are using.

Group the mixture of foliage and flowers together between your thumb and forefinger – imagine you’re making a tiny bunch of flowers to give to a fairy. It’s good to use a flat piece of foliage at the back so that it sits well against the body when worn.

Once you’re happy with how the little bunch looks, wrap the wire tightly around the stems to hold them in place. Be careful not to cut through or break the softer stems with the wire.

Cover the wire with the ribbon and finish with a knot or a small bow.

As the stems aren’t wired or taped, it means you can keep the buttonholes fresh overnight by sitting them in a very shallow dish of water. This also gives you time for a manicure!

So there you have it. Lets hear your ideas for DIY flowers and if any of you will be using this tutorial to help you DIY in style…

Yours Truly,

Rebecca
xoxo

PS, If you’re not DIY-ing and need a fabulous florist, please do check out the Blossom website (North West based) and give Becky a call

DIY Devotee

March 11th, 2011

So, DIY Devotee has come back out of retirement! We hope you’ll give her a warm welcome back.

Truth be told I was getting a bit weary and losing the faith, wondering if in fact any of our dear readers actually used or liked DIY Devotee. However, with a recent barrage of DIY weddings, more than a few totally rocked up with DIY inspiration from these very pages, I decided it was time to bring her back. Here’s a little round up of things I’ve seen and liked, from me to you.

Making Magazine

Magazine Whore that I am, this was an exciting find to share with you all. Purchased in Charlotte’s local Tesco’s, Making Magazine is full of quirky little projects for the crafty amongst you, including sections on living (home decor), kitchen recipes and even clothing patterns. I was particularly taken by the origami lantern on the front cover, imagining it in all sorts of florals and patterns as hanging decor for a DIY affair.

One such project in this issue was a Truffle recipe perfect for DIY chocolate favours. Yum. I’d certainly recommend you keep a little eye out for it when you’re browsing the rails and have a flick through to see if there’s anything to inspire you for your wedding.

Martha Review

How could I return to DIY Devotee without Martha? In fact I’m not sure we’ve linked to one of her projects since featuring her DIY Poms tutorial, but she has some amazing little makes to share and here’s a round up of my favourites…

For a fresh take on the cupcake tower, plus a playful nod towards the traditional wedding cake, how about this cupcake stand?

Photo booths are staying popular but how about moving away from the vintage slant on the idea and taking the trend to a fresher, more whimsical level with this swirly backdrop. Super Sweet :)

Use your super cute Page boy or flower girls to run around with these gorgeous flags announcing various parts of the day. These designs include cake cutting and your arrival at the reception, but you could make your own messages… ‘Have you signed the guest book?’ or ‘Dessert Table now Open!’.

My favourite of the lot? This amazing little Save the Date DIY. Also a great prop for an engagement shoot or on your wedding day!

Vintage look-alikes

Lastly, I stumbled upon this little idea. For those of you who have fallen in love with all things vintage, there’s a few different ideas around using vintage hankys for printing invites onto, or even writing guest messages onto with fabric markers and making a pretty quilt afterwards. Of course all that depends on finding the hankies or splurging on Vintage look designs. How about using this little Hanky Love Letters downloadable from Eat Drink Chic for guests to write you a note, or with a little customisation, even save the dates or invites?

As always readers, let us know if you’ll be pinching any of these and I’ll look forward to seeing them on our pages in a few months time!

Yours Truly

Rebecca
xoxo

PS We’d love to see your DIY ideas and triumphs! DIY contributions can also be submitted for featuring on the blog – send your ideas and emails to rebecca@rockmywedding.co.uk wedding related or otherwise!

DIY Devotee… A Verity Special

December 17th, 2010

So this week we have a very special (as requested by lots of you in our impromptu Saturday Survey a few weeks back) Real Bride DIY Devotee. We would love to feature more like this, so I hope this encourages those of you hanging back to send us something in!

Without further ado… the how-to for Verity’s luscious lip and moustach props :)

What you need:

Fimo modelling clay – we used black, brown and grey for the moustaches and a sparkly pink for the lips. One pack will usually make two props.

Wooden chopsticks or kebab sticks

Some templates of different shapes

A smooth surface to work on

A knife or other implement with a sharp edge

A bit of creativity and lot of patience!
Get creative!

I used to be obsessed with Fimo when I was a kid. I’d make badges and ornaments for everyone I knew! During our wedding planning, Dean and I came across a few wedding shoots where moustaches had been used (to great effect) and I instantly thought of Fimo. You can actually buy readymade props like this on Etsy, but they cost a fortune compared to making your own and it’s heaps of fun, trust me! Fimo is so easy to work with, we even had Dean’s little boy Chester helping us – he did mini versions for the kids, which were so cute!

I downloaded a template from the Martha Stewart website just to give me an idea of the different shapes we could make. You could also draw your own, or use these photos to base yours on. It does help to have a guide next to you as you work.

For an Imperial style moustache:

Break each Fimo square into two pieces and then warm up one half by kneading it with your hands. You will get some residue on your hands so make sure you don’t have to stop halfway through or you could end up with black marks all over your house!

Once the Fimo is soft enough to model with, start by rolling it on your smooth surface into a sausage shape that’s fat in the middle.

Now lay it down on the surface and make a pinch the middle of the sausage, then turn the edges upwards. The depth of the curve will depend on the style you want to create. Use the back of a knife to smooth and enhance the ‘dip’ in the centre of the sausage. Use the tips of your finger to mould the edges into your desired shape. It might take a few attempts to get the shape right – if you go wrong just squish it back into a ball and start again.

There are a number of ways you can finish the look. Dean made one where he created a ‘hairy’ feel to the moustache using a sharp pin to create lots of hair lines down the sides. I liked using the back of a knife to create wide indents on straight moustaches to create a ‘curtain’ effect. And on the lips, once the shape was complete, I rubbed my finger across the whole surface to create a shiny look, and then used a knife to create vertical lines on the inside edge of the lips. Quite realistic looking I think you’ll agree!

Once you are happy with the shapes, use a chopstick to create a hole in each prop where the chopstick will be inserted. Again, it’s up to you where you put this. On some designs, like the lips, it works better to have the whole in the middle, on others you can put it on the side.

Lay your finished props in an ovenproof dish and bake according to the manufacturer’s instructions. They will become hard and may change colour slightly upon baking.

Once cooled, attach the chopsticks to the props, using superglue to secure them if required.

Get out a mirror and try them out. If you wind up laughing, job done!

One last tip: be prepared for these wonderful props to go ‘missing’ on the night of your wedding. Many of our friends sent us guilty texts a few days after the wedding saying they’d taken them home, they’d loved them so much. And I know for a fact that our props have been used for at least one hen night and one photo shoot since our wedding. Maybe we should take a few with us on honeymoon…!

Thanks so much to Verity and Dean for the amazing effort they put into this while they were packing for their honeymoon!

Will you be trying this one at home?!

Yours Truly,

Rebecca
xoxo

DIY Devotee… A Christmas Special!!!!

December 5th, 2010

So, while you lovely ladies were giving us your Saturday Survey Feedback a couple of weekends ago, I was spending a (slightly prematurely) Christmassy morning with Becky Hay from Blossom. All in the name of improving DIY Devotee for you all, Becky made some fabulous arrangements, starting off with a DIY table center for a Christmas Rustic Wedding. Of course, the best bit is that these translate beautifully to your Christmas Table and we’ll be showing you exactly how-to!

In the interests of making the whole thing even simpler, I also made a short video for you all, so please let us know what you think… (it’s even got Christmas music!)

So lets get started!

What you need

Empty jam jars – any sizes work
Double sided tape
Sections of tartan fabric (or your chosen material or even brown paper style wrapping paper would work)
Ribbon
Dried orange slices
Cinnamon sticks
Floristry scissors
Ribbon scissors
Pinking shears
Florist wires
Small pine cones

Selection of wintry foliage (we used: blue spruce, berried ivy, rosemary, holly, red skimmia, eucalyptus, kochia (the silvery grey foliage), Ilex berry (the hybridised holly which is grown just for berries). Absolutely any foliage you can raid from any garden will work.

Red Anemones
Luxor Roses
Black Baccara roses
Again, any flowers would work with this and you only need a few heads per small vase.

The How-To

1. Place a line of double sided tape around the jam jar.
2. Cover the jar with the tartan fabric, making sure it’s stuck to the tape.
3. Tie the ribbon around the fabric for added security and use the orange slice and cinnamon stick for added decoration.
4. Fill the jar with water.

5. Fill the jar with a mixture of foliage. Make sure you remove all foliage from the base of each stem so that the water remains ‘leaf’ free and clean.
6. Add the berries next so that they don’t get lost amongst the foliage and are clearly visible.
7. Place the flowers through the arrangement, again, taking care to remove any leaves that will fall below the water level.

8. Loop a wire around the base of each cone and twist tightly so that the cone can be easily inserted amongst the foliage and flowers..
9. Arrange the jars in a line up the centre of your table, along a mantelpiece, or in a group in the centre of a round table and scatter the surrounding surface with cones.

Decorating your Christmas table

We thought we would take this a little bit further than we have in the past and look at the whole Christmas table – all the ideas here work well for a winter wedding or for your own home and entertaining come Christmas.

It’s the oldest trick in the book but luxe = lots. Whatever you decide to do to decorate (again, this works in weddings and at home) grouping items that are the same/similar or work together gives a luxurious, plentiful feel. For that reason, don’t scrimp on the candles, tea light holders or in this case, pine cones! Layer up your china, table cloths/runners and pile the plates high with festive cheer.

I completely fell in love with the little clove studded and ribbon-wrapped oranges Becky brought with her, reminding me of Cristingle at primary school. Familiar to you or not, these are easily made, days ahead, and make a gorgeous table setting or scattered around your home, fruit bowl, mantelpieces etc for extra home-made charm, not to mention cute place names.

A few DIY notes!

The full DIY how-to for the jars the flowers are in, is on the video (see below).

The Orange slices used here for the jars can be purchased in craft shops relatively cheaply, however they are just as easy to DIY at home. Slice your oranges into half centimeter slices, dry and place on a baking sheet in the oven at a low temperature (around 100 degrees,) to dry them out – this can take several hours. Allow to cool, and as well as looking great in this DIY they have loads of other uses including decorations for your tree, extra decoration on your gifts or I like to hang them from light fittings and under picture frames.

All the extra decor items are my own, and built up over the years, the Feather wreath is Parlane, the tea lights (ceramic) from Cox and Cox and (the red flat ones) from Ikea. Both the table runner and the napkins are John Lewis.

To make your own Clove studded oranges, simply stud the fruit in 2 lines right the way around it, at right angles to each other. You might wnat to miss out a few where they cross to allow the ribbon to sit better. Next tie the orange up like a parcel, at right angles to the lines of cloves. Tie one knot then under your final bow, insert a stick of cinnamon. Voila!

I really hope this has made you feel extra Christmassy and all fired up to create your own ideas for the festive season, or in fact your winter wedding. Enjoy the video and please come back to view it if you are reading at work! Thank you so much to Becky @Blossom for all her hard work putting this together with me and look out for another winter inspiration table coming soon!

DIY table decor with Becky Hay from Blossom for www.rockmywedding.co.uk.

We are always on the look out for extra reader-inspired DIY projects, so if you have a Christmas project you would like to share, or a winter wedding DIY please send them along (rebecca@rockmywedding.co.uk) and we’ll get them up in the coming weeks. (All we need is some text and accompanying images.)

Time for some mulled wine I think!

Yours Truly,

Rebecca
xoxo

Related Posts Plugin for WordPress, Blogger...