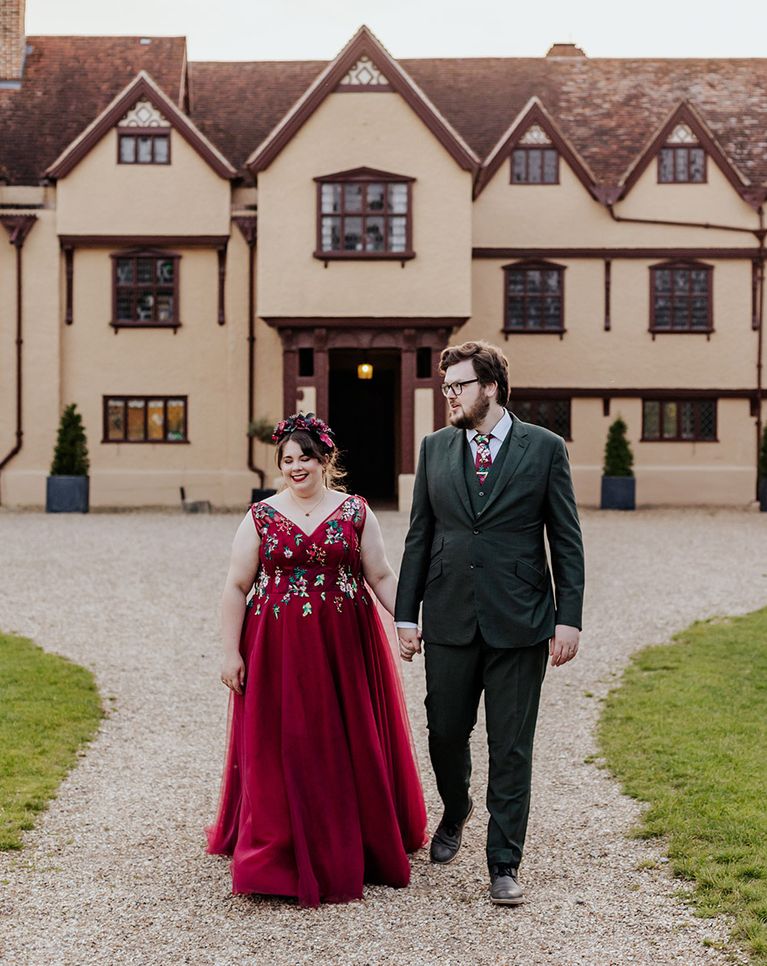
Well hello readers. After seeing the very gorgeous Naomi yesterday in all her modern bridal style glory we thought we should share some serious stuff. The hair people. Don’t mess with the hair.
I love hair info. Mainly because I am tres lazy with my own and rough dry it most of the time due to time constraints but if I could have one beauty luxury it would be a stylist on tap for daily blow-dries and styling. Today however, we’re sharing the knowledge needed for you to become masters of your own hair destiny and recreate a Bridal up and down do… even both if you want to convert them either which way during your big day. My advice? Practice makes perfect. Practice practice practice so there’s no fear of it not going your way on the day, until your desired style is 100% re-creatable.
Failing that, employ a true expert like Severin Hubert. THE bridal maestro when it comes to sculpting super cool, modern bridal hair, Sev started styling in the music industry and is now sought after by many a bride who wants to ensure their hair is their crowning glory. You can’t go wrong with this guy.
For now however, lets see his skills and enjoy the DIY tutorial ladies. I’d love to see the results posted on our FB page.
Preparing the Hair
Before styling, wash hair as normal but with no conditioner – I know it sounds crazy but if you want your style to hold for the whole day please try not to add conditioner. I do suggest though using hair products to help keep the desired style you are wanting to create. Look for a good brand name, you may have to spend a little more but it’s worth it…after all you are getting married! I like to use Milkshake products, they do exactly what they say they do and the smell is delicious!
Steps 1 to 4
– With my brides I almost always blow dry the hair first to create a sleek and smooth base. I used a medium round bristle brush.
Step 5 & 6
Now take sections of hair and curl by wrapping the hair around a medium pair of tongs. Curl the whole head and then leave to cool.
Step 7 & 8
Next, I asked Naomi to lean her head back whilst I started to break up the curls using my hands.
Step 9 & 10
Then all I had to do was place the hair according to how I wanted the style to sit. I finished off by using a firm hair spray and a shine spray to add a gloss finish.
Et Voila! The finished result…
Glamorous and gorgeous. We. Love.
Converting to an Up-Do
As a second look for Naomi we decided to give her an up do with a twist of Rock chick. The hair had already been prepared with the blow dry and setting so all I had to do was first leave a small section of hair at the front for later.
Steps 1 and 2
With the rest of the hair I brushed the hair to one side and fixed with a couple of hair grips along the side of the head. Then repeated the same procedure on the other side.
You now have a column of curls cascading down the middle of Naomi’s head.
Steps 3 and 4
All I did next was to take strands of hair and started to place and secure with grips creating a messy french pleat.
Steps 4 to 8
Once I was happy with the shape I then backcombed the piece at the front to create a quiff. Fix with hair spray and finish with your chosen accessories.
So that’s it folks, DIY your hair up-ways, down-ways, anyway you like it, but rock it out Naomi Style
All Hair styling and Instruction – Severin Hubert at the Hepburn Collection.
Photography – C B Media.
Yours Truly,
Rebecca
xoxo


![Milk_Shake[1]](http://www.rockmywedding.co.uk/wp-content/uploads/2011/02/Milk_Shake1.jpg)


